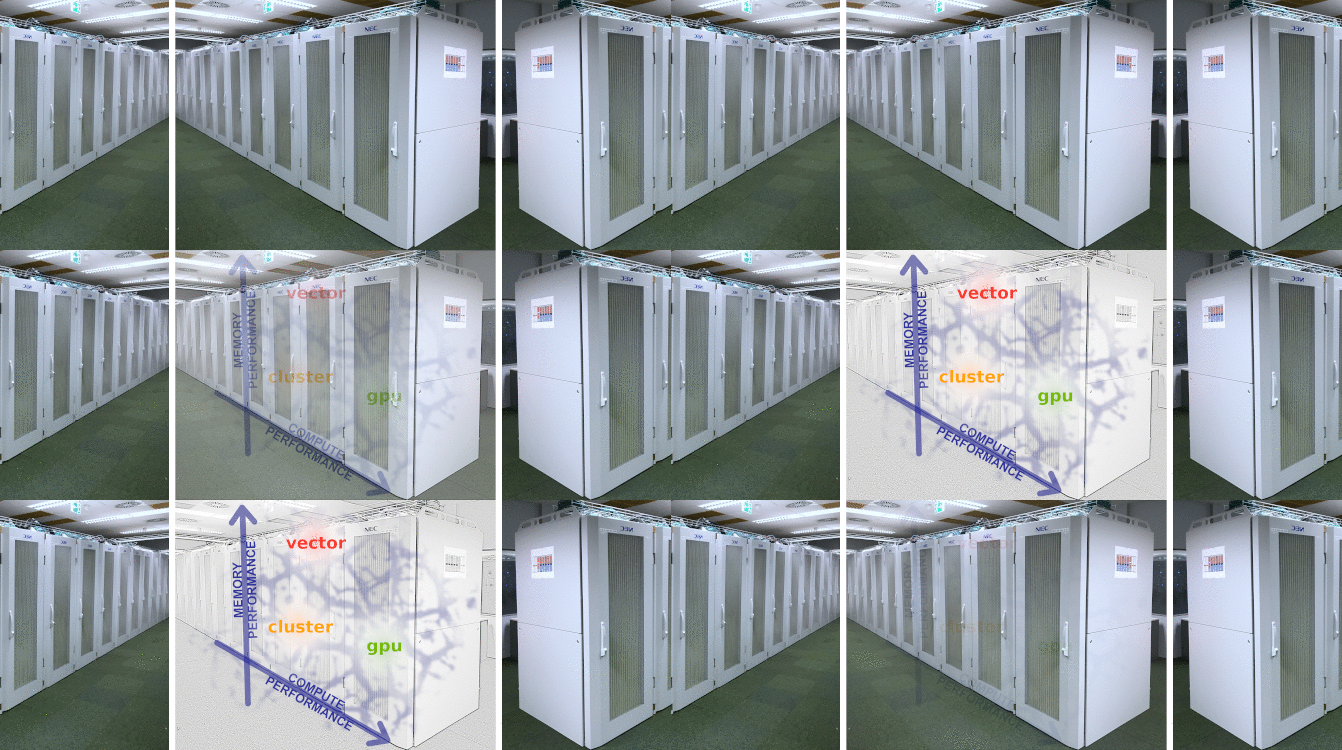
NEC HPC system (nesh)

no/neinStudents yes/jaEmployees yes/jaFaculties no/neinStud. Unions

nesh

The NEC HPC system (alias nesh) of the University Computing Centre (RZ) is a hybrid computing system which provides a high computing power in form of a combination of a scalar NEC HPC Linux Cluster including GPUs and a NEC SX-Aurora TSUBASA vector system. Performance features and highlights:

  • Red Hat Enterprise Linux 8.2 as operating system
  • Overall 14912 Intel Xeon x86-64 cores, 5120 NVIDIA CUDA cores, and 512 NEC SX vector cores
  • GxFS for all system-wide parallel file systems; /home: ~280TB, /work: ~10PB
  • 3 Slurm partitions in a single batch system, serving the compute nodes of the Linux Cluster, GPU and SX-Aurora TSUBASA subsystems


Status


System utilization

The following figure shows the raw usage of the individual fair-share accounts over the last seven days. Note that accumulated raw shares decay over time with an exponential decay law.

The following figure shows the node usage of the Linux Cluster, GPU and SX-Aurora TSUBASA subsystems over the last seven days (obtained from the Slurm command sinfo -s).

Hardware


Login

  • 4 front end nodes with:
    • 2x Intel Xeon Gold 6130 (Skylake), 32 cores (2.1GHz), 768GB main memory
  • Generic login: nesh-fe.rz.uni-kiel.de


Linux Cluster subsystem

  • 280 compute nodes with:
    • 2x Intel Xeon Gold 6226R (Cascade Lake), 32 cores (2.9GHz), 192GB main memory
  • 172 compute nodes with:
    • 2x Intel Xeon Gold 6130 (Skylake), 32 cores (2.1GHz), 192GB main memory
  • 8 compute nodes with:
    • 2x Intel Xeon Gold 6130 (Skylake), 32 cores (2.1GHz), 384GB main memory
  • 4 compute nodes with:
    • 2x Intel Xeon Gold 6226R (Cascade Lake), 32 cores (2.9GHz), 1.5TB main memory
  • Interconnect technology: EDR InfiniBand


GPU subsystem

  • 2 compute nodes (nesh-gpu00, nesh-gpu01) with:
    • GPU host system: 2x Intel Xeon Gold 6226R (Cascade Lake), 32 cores (2.9GHz), 192GB main memory
    • 4x NVIDIA Tesla V100-GPU, each with:
      • NVIDIA Volta GPU architecture
      • 640 tensor cores, 5120 CUDA cores, 32GB GPU memory
      • 900GB/s memory bandwidth
  • Interconnect technology: EDR InfiniBand


SX-Aurora TSUBASA vector subsystem

  • 8 compute nodes of type A300-8 (neshve00, ..., neshve07) with:
    • Vector host (VH) system: 2x Intel Xeon Gold 6126 (Skylake), 24 cores (2.6GHz), 192GB main memory
    • 8x NEC SX-Aurora TSUBASA vector engine (VE, type 10B), each with:
      • 8 NEC SX vector cores (1.4GHz), 48GB VE memory
      • 64 logical vector registers per core (max. vector length: 256x64 Bits)
      • 1.2TB/s memory bandwidth
  • Interconnect technology: EDR InfiniBand
  • TSUBASA: meaning "wing" in Japanese.


Data mover

  • 2 data mover nodes (nesh-dm01, nesh-dm02) with:
    • 2x Intel Xeon Silver 4214 (Cascade Lake), 24 cores (2.20GHz), 192GB main memory
  • Data mover nodes have access to home and work file systems, tape library and internet
  • Batch usage via the Slurm partition data.
  • Important remark: Use data mover nodes only for data staging and I/O operations to the tape library and the internet. Any CPU intensive task should not be performed there!


Access


User account

To apply for an account on the NEC HPC system, please, fill in and sign the form No. 3 called "Request for use of a High-Performance Computer" and send it to the Computing Centre's user administration office. The form and further information is available here.

System password

Before the first login, a password must be set in your CIM service portal. You can find a detailed description on how to set a service password here. Under the CIM menu item Settings > Passwords > Advanced Options > Account & Service Selection please click on the service NEC HPC System and change the password accordingly. Note, that the password cannot be changed from the command line on the NEC HPC system.

System access

From within the campus network of Kiel University, the login nodes of the NEC HPC system are accessible via SSH:

ssh -X <username>@nesh-fe.rz.uni-kiel.de
  • The additional option -X activates X11 forwarding, which is required, e.g., for GUI applications.
  • Suitable SSH clients for Windows PCs are MobaXterm, X-Win32 or Putty. MobaXterm and WinSCP can be used for data transfer.
  • From outside the campus network (e.g., from home) you first need to establish a VPN connection to this network using the same username. To apply for the VPN dial-up access of the Computing Centre, please, fill in and hand in the form No. 1, see here for details.


File systems


The NEC HPC system offers different file systems to handle data. Each of these file systems has its own purpose and features. Therefore, please, follow the guidelines below!

Quota information for the home and work file systems can be displayed with the command

workquota 


Home file system

  • Contains the user's home directory, which is also accessible via the environment variable $HOME.
  • There will be a regular backup (typically daily) of your data in $HOME.
  • Disk space is limited by user quotas. Default disk space quotas: 150GB (soft) and 200GB (hard).
  • Suited for software, programs, code, scripts and a small amount of results which necessarily needs a backup.
  • The home directory should not be used for batch calculations. Thus, please change to your work directory first!


Work file system

  • Contains the user's work directory, which is also accessible via the environment variable $WORK.
  • There exists no backup of your data in $WORK. Thus, please, be careful!
  • Disk space is limited by user quotas. Default disk space quotas for CAU users: 1.8TB (soft) resp. 2.0TB (hard) and 4.5TB (soft) resp 5.0TB (hard) for GEOMAR users.
  • Should be used for batch calculations!


Lokal disk space

  • Disk space that is directly attached to a compute node.
  • The size of the local disk depends on the respective node. Please, see command sinfo in section 'Batch processing (Slurm)'.
  • Accessible within a batch job via the environment variable $TMPDIR.
  • Suited for I/O-intensive computations due to fast access times.
  • Attention: Local disk space is only available during a running batch job, i.e., all data on the local disk will automatically be removed after job termination.


Tape library

  • Disk space with automatic file relocation on magnetic tapes.
  • Accessible from all login nodes via the environment variable $TAPE.
  • Suited for storing non-active data which are currently not used.
  • Not suited for storing a large number of small files.
  • Data must be compressed in form of file archives (e.g., tar files) before transmission to $TAPE. Recommended file sizes 3-50GB. File sizes must not exceed 1TB due to the limited tape capacity.
  • Data transfer to and from the tape library must not be performed with the rsync command!
  • Attention: Do not work directly with your files on the tape library directory! Instead, copy the desired file(s) back to the work directory before further processing. Note that this also includes the step of unpacking file archives.
  • Batch usage via the Slurm partition data., cf. data mover nodes under section 'Hardware'.


Software


Operating system

  • Red Hat Enterprose Linux 8.2
  • Bash as the supported default Unix shell.


Module environment

User software, including compilers and libraries, are mainly deployed via lmod environment modules, which perform all actions necessary to activate the respective software package. To list all available environment modules, use the command

module avail

To activate and deactivate a software package, there exist load and unload sub-commands. To use the GCC compiler version 10.2.0, for example, the sequence of commands would be

module load gcc/10.2.0
gcc ...
module unload gcc/10.2.0
# or to deactivate all loaded modulefiles
module purge

To list all loaded modulefiles, for more information about a specific package and a complete list of module commands, see the list, show and help sub-commands:

module list
module show gcc/10.2.0
module help
In case you want to use Matlab, Python, R or Perl, please, also read the software specific informations in the sections below.
Note that, if not otherwise specified, all software packages available via modulefiles have been built with the GCC compiler version 9.10.0.
Modulefiles for the cluster subsystem with ending "-intel" have been built with the INTEL compiler version 20.0.4.


Compilers (Linux Cluster subsystem)

To compile source code, there exist on top of the system's default compiler (which is GCC version 8.3.1) additional compilers, see the compilers section displayed by the module avail command. Examples:

GCC compilers:

module load gcc/10.2.0
gfortran / gcc / g++ ...

Intel compilers:

module load intel/20.0.4
ifort / icc / icpc ...

Intel MPI compilers:

module load intel/20.0.4 intelmpi/20.0.4
mpiifort / mpiicc / mpiicpc ...


Compilers (GPU subsystem)

The NVIDIA CUDA toolkit can be used to compile source code for the GPU subsystem. A basic example:

NVIDIA CUDA compilers:

module load cuda/11.1.0
nvcc -o test.gpu.x test.cu

# to include OpenMP multithreading
nvcc -o test.gpu.x -Xcompiler -fopenmp test.cu

# to run the NVIDIA GPU profiler
nvprof ./test.gpu.x
In order to test the binary use an interactive batch job on the Slurm partition 'gpu', see section 'Batch processing (Slurm)' for how to set up an interactive batch job.
Note, that the execution of the generated binary on the front end may lead to wrong results!
For more information on the NVIDIA GPU profiler, see here.


Compilers (SX-Aurora TSUBASA vector subsystem)

In order to to be able to run on the vector engines (VE) of the SX-Aurora TSUBASA vector system, source code needs to be cross-compiled using special NEC SX-Compilers:

NEC SX-Aurora TSUBASA compilers:

module load ncc/3.1.0
nfort / ncc / n++ ...

NEC SX-Aurora TSUBASA compilers for MPI programs:

module load necmpi/2.11.0
source necmpivars.sh
mpinfort / mpincc / mpin++ ...

Inclusion of the NEC numeric library collection (NLC):

module load necnlc/2.1.0
source nlcvars.sh <arguments>
(mpi)nfort / (mpi)ncc / (mpi)n++ ...
For the arguments that should be passed to the nlcvars.sh script, see the NEC numeric library collection user guide.


Further important remarks:

For detailed user guides on the NEC (MPI) compilers, the NEC numeric library collection, the NEC proginf/ftrace viewer and the NEC parallel debugger, see section 'Documentation' and/or here.
The VE itself does not run an operating system, instead the so called VEOS is processed on the VH and a corresponding library part is linked to the application running on the VE.
Each process on the VE has a shadow process on the vector host (VH) system, which is performing the I/O and other administrative tasks for the process on the VE.


Matlab

CAU users have to use the module file matlab/2020b for setting up the Matlab environment, and users form the GEOMAR have to use the module file matlab_geomar/2020b.

Remarks:

In batch calculations, please, adapt the number of compute threads to the number of requested cores, e.g., by setting maxNumCompThreads(N) in your .m file.


Python

The global Python installations available as software modules, e.g., via module load python/3.8.6, contain only the base installations and therefore do not include any additional Python packages. Moreover, we explicitly refrain from installing extra packages globally on demand in order to avoid package conflicts. The inclusion of additional packages, such as numpy, scipy, or tensorflow, is however easily possible by using the concept of virtual environments.

Here are the main steps for working with virtual environments:

Python version 3.x

1. Creating a virtual environment

To create a virtual environment called my_env, decide upon a directory where you want to place it in your $HOME directory (e.g., $HOME/my_python3_env), and run the following commands:

module load python/3.8.6
mkdir $HOME/my_python3_env
python3 -m venv $HOME/my_python3_env/my_env

2. Installing a package into a virtual environment

To install, upgrade or remove a Python package, activate the virtual environment and use the program called pip3. As example, let us install numpy:

module load python/3.8.6
source $HOME/my_python3_env/my_env/bin/activate
module load gcc/10.2.0
pip3 install numpy
deactivate

As compiler we suggest to use the GCC compiler version 10.2.0 by loading the corresponding module (module load gcc/10.2.0) prior to any call of pip3. Moreover, note the deactivate command at the end, which removes any settings performed by the activation source command.

3. Using the installed package

To use any package that has been installed into a virtual environment called my_env do

module load python/3.8.6
source $HOME/my_python3_env/my_env/bin/activate
...
deactivate

where in between the source and the deactivate command the package will be usable.


R

The global R installations available as software modules are only base installations containing the standard packages, and we explicitly refrain from installing addtional packages globally on demand in order to avoid package conflicts. Additional packages can easily be installed locally by each user with the install.packages() function in R.

In order to install an additional package please carry out the following steps:

1. Create a new directory in your home directory into which you would like to install the R packages, e.g., R_libs, and include this new directory into the $R_LIBS environment path variable

mkdir R_libs 
export R_LIBS=$HOME/R_libs:$R_LIBS

2. Load the R and the gcc/10.2.0 software module and install the needed packages within R, with the install.packages() function (e.g., the lattice package)

module load R/4.0.2 gcc/10.2.0
R 
> install.packages("lattice",lib="~/R_libs")

--- Please select a CRAN mirror for use in this session ---
Secure CRAN mirrors
...

# Select a mirror in Germany

3. To load a locally installed R packages, use the library command with parameter lib.loc as:

> library("lattice",lib.loc="~/R_libs")
Note, that you always need to export the variable R_LIBS (as under point 1.) before using the installed R packages, i.e., also inside (batch) scripts.


Perl

To avoid Perl module conflicts, Perl should be installed locally by each individual user using the management tool Perlbrew. To get Perlbrew and to install a specific version of Perl, please follow this example:

module load gcc/10.2.0
curl -L https://install.perlbrew.pl | bash
source ~/perl5/perlbrew/etc/bashrc
perlbrew install --notest perl-5.34.0

In order to list all locally available Perl versions and to activate and use the installation, use the commands

source ~/perl5/perlbrew/etc/bashrc
perlbrew list
perlbrew switch perl-5.34.0

Finally, to install additional Perl modules please follow these lines:

# install cpanm
source ~/perl5/perlbrew/etc/bashrc
perlbrew install-cpanm

# use cpanm to install required module
cpanm Math::FFT

# check if module can be found (should produce no error message)
perl -e "use Math::FFT"


TensorFlow

In this section, we describe the installation of TensorFlow within a Python virtual environment and how it can be used on the GPU subsystem.

1. Installation:

module load python/3.8.6
mkdir $HOME/my_python3_env
python3 -m venv $HOME/my_python3_env/tf
source $HOME/my_python3_env/tf/bin/activate
module load gcc/10.2.0
pip3 install tensorflow
deactivate

2. Testing the installation on the GPU subsystem using a interactive batch job:

# request an interactive session on one of the GPU nodes
srun --pty --partition=gpu --nodes=1 --cpus-per-task=1 --gpus-per-node=1 --mem=1000 --time=00:10:00 /bin/bash

# after srun has granted access to either nesh-gpu00 or nesh-gpu01, run the following:
module load python/3.8.6
module load cuda/11.1.0 cudnn/8.0.4.30-11.1
source $HOME/my_python3_env/tf/bin/activate
python3
...
>>> import tensorflow as tf
...
>>> print("Num GPUs Available: ", len(tf.config.experimental.list_physical_devices('GPU')))
...
>>> quit()
deactivate

# Example script: test.py

import tensorflow as tf
# Launch the graph in a session
with tf.compat.v1.Session() as ses:
    # Build a graph
    a = tf.constant(5.0)
    b = tf.constant(6.0)
    c = a * b
    # Evaluate the tensor c
    print(ses.run(c))

Note that, although each GPU node has in total four NVIDIA Tesla V100 cards, only the requested number of cards will be available within Tensorflow. This is why the above print statement should result in the output "NUM GPUs Available:  1".


Batch processing (Slurm)


Fair-share

The new batch system (Slurm) does not assign the job priority on a First In - First Out (FIFO) basis. Instead a multi-factor fair-share algorithm schedules user jobs based on the portion of the computing resources (= allocated cores*seconds + main memory usage) they have been allocated and resources that have already been consumed. This guarantees a fair distribution of the overall available compute resources among all users.

Important is that the fair-share algorithm does not involve a fixed allotment, whereby a user's access to the compute resources is cut off completely once that allotment is reached. Instead, queued jobs are prioritized such that under-serviced user accounts are scheduled first, while over-serviced user accounts are schelduled later (when the system would otherwise go idle). Moreover, the user's consumed resources decay over time with an exponential decay law.

We distinguish two top-level fairshare accounts comprising the GEOMAR users (~60%) on the one hand and CAU users (~40%) on the other.

To list your own current (raw) usage and the resulting (raw) shares, use the command

# note the capital "U"
sshare -U


Performing batch calculations

To run a batch calculation it is not only important to instruct the batch system which program to execute, but also to specify the required resources, such as number of nodes, number of cores per node, main memory or computation time. These resource requests are written together with the program call into a so-called batch or job script, which is submitted to the batch system with the command

sbatch <jobscript>
Note, that every job script starts with the directive #!/bin/bash on the first line. The subsequent lines contain the directive #SBATCH, followed by a specific resource request or some other job information, see the next section for a parameter overview and the template section for examples. At the end of the job script, one finally loads the modulefiles (if required) and thereafter specifies the program call.
The default Slurm partition is called 'cluster' and serves the compute nodes of the Linux Cluster subsystem.
The Slurm partitions called 'gpu' and 'vector' serve the compute nodes of the SX-Aurora TSUBASA vector subsystem and of the GPU subsystem.
The Slurm partition  'data' gives access to two data mover nodes, which can be used for data transfer between the home/work file system, the tape library and the internet.

The partitions' default parameters and limits can be viewed with the command

scontrol show partitions

After job submission the batch server evaluates the job script, searches for free, appropriate compute resources and, when able, executes the actual computation or queues the job.

Successfully submitted jobs are managed by the batch system and can be displayed with the following commands

squeue

# or
squeue -u <username>

# or for showing individual job details
squeue -j <jobid>
scontrol show job <jobid>

To terminate a running or to remove a queued job from the batch server, use

scancel <jobid>

Further batch system commands:

# gather resource informations of a running job
sstat -j <jobid>.batch

# general partition information
sinfo

# show node list incl. available cpus, memory, features, local disk space
sinfo --Node -o "%20N  %20c  %20m  %20f  %20d"
Please, do never request the whole main memory of a compute note. As a rule of thumb, you should leave ~1-2GB for the operating system. Moreover, note the conversion factor of 1 over 1024 when going from Megabyte (M), the Slurm default memory unit, to Gigabyte (G).


Special requests (e.g., longer walltimes) can be defined by setting a specific quality of service, see also the --qos option in the batch parameter table:

# gather information about available quality of services
sacctmgr show qos
The default quality of service is 'normal'.
Note, that the quality of services named 'special' is available only on request and that the quality of services named 'internal' and 'override' are for system admins only.


Job information

To obtain a summary of resources that have been consumed by your batch calculation (inter alia: jobid, node list, elapse time and maximum main memory), you can include the following line at the very end of your batch script:

jobinfo
Note, that the information is written to the stdout path unless directly piped to a file.
Moreover, the jobinfo tool will not work outside a batch job and is still under development, thus subject to change. If you encounter problems, please, report to hpcsupport@rz.uni-kiel.de.


Job reason codes

A batch job may be waiting for more than one reason. The following (incomplete) list of codes identify the reason why a job is waiting for execution:

  • Priority: One or more higher priority jobs exist for this partition or advanced reservation.
  • AssocGrpCPURunMinutesLimit: We limit how much you can have running at once.
  • QOSMaxCpuPerUserLimit: The job is not allowed to start because your currently running jobs consume all allowed cores for your username.


For a complete list of job reason codes, see here.


Batch parameters

The following table summarizes the most important job parameters. For more information, see here.

Parameter Explanation
#SBATCH Slurm batch script directive
--partition=<name> or -p <name> Slurm partition (~batch class)
--job-name=<name> or -J <jobname> Job name
--output=<filename> or -o <filename> Stdout file
--error=<filename> or -e <filename> Stderr file; if not specified, stderr is redirected to stdout file
--nodes=<nnodes> or -N <nnodes> Number of nodes
--ntasks-per-node=<ntasks> Number of  tasks per node; number of MPI processes per node
--cpus-per-task=<ncpus> or -c <ncpus> Number of cores per task or process
--gpus-per-node=<ngpus> Number of GPUs per node
--gres=<gres>:<n> Number of generic resources per node, either --gres=gpu:n with n=1,2,3,4 for the GPU subsystem (number of GPUs) or --gres=ve:n with n=1,2,3,...,8 for the vector subsystem (number of vector engines)
--mem=<size[units]> Real memory required per node; default unit is megabytes (M); use G for gigabytes
--time=<time> or -t <time> Walltime in the format "hours:minutes:seconds"
--no-requeue Never requeue the job
--constraint=<feature> or -C <feature> Request a special node feature, see command sinfo above for available features
--qos=<qos-name> or -q <qos-name> Define a quality of service
--mail-user=<email-address> Set email address for notifications
--mail-type=<type> Type of email notification: BEGIN, END, FAIL or ALL


Some environment variables that are defined by Slurm and are usable inside a job script:

Variable Explanation
$SLURM_JOBID Contains the job ID
$SLURM_NODELIST Contains the list of nodes on which the job is running
$SLURM_JOB_USER Contains the username
$SLURM_JOB_NAME Contains the name of the job as specified by the parameter --job-name

Note, that during job submission in Slurm all environment variables that have been defined in the shell (so far), will automatically be transferred to the batch job. As this can lead to undesired job behaviors, it is advisable to disable this feature with the following job parameter:

#SBATCH --export=NONE


Special batch jobs

To run batch calculations with interactive access, Slurm provides two options:

1. Interactive jobs without X11 support

srun --pty --nodes=1 --cpus-per-task=1 --mem=1000 --time=00:10:00 /bin/bash
  • This command gives access to a remote shell on a compute node of the specified partition with the given resources. Type exit to close the interactive session.

2. Interactive jobs with X11 support

srun --x11 --pty --nodes=1 --cpus-per-task=1 --mem=1000 --time=00:10:00 /bin/bash
  • Type exit to close the interactive session.


Batch script templates (Linux Cluster subsystem)


In this section, you will find templates for perfoming typical Linux Cluster batch jobs.

1. Running a serial calculation

#!/bin/bash
#SBATCH --job-name=test
#SBATCH --nodes=1
#SBATCH --tasks-per-node=1
#SBATCH --cpus-per-task=1
#SBATCH --mem=1000
#SBATCH --time=01:00:00
#SBATCH --output=test.out
#SBATCH --error=test.err
#SBATCH --partition=cluster

export OMP_NUM_THREADS=1
./test.x

2. Running an shared-memory OpenMP-parallel calculation

#!/bin/bash
#SBATCH --job-name=test
#SBATCH --nodes=1
#SBATCH --tasks-per-node=1
#SBATCH --cpus-per-task=8
#SBATCH --mem=10000
#SBATCH --time=01:00:00
#SBATCH --output=test.out
#SBATCH --error=test.err
#SBATCH --partition=cluster

export OMP_NUM_THREADS=8
./test.x

3. Running a multi-node Intel-MPI-parallel calculation

#!/bin/bash
#SBATCH --job-name=test
#SBATCH --nodes=2
#SBATCH --tasks-per-node=32
#SBATCH --cpus-per-task=1
#SBATCH --mem=128000
#SBATCH --time=01:00:00
#SBATCH --output=test.out
#SBATCH --error=test.err
#SBATCH --partition=cluster

export OMP_NUM_THREADS=1
module load intel/20.0.4 intelmpi/20.0.4
mpirun -np 64 ./test.x

4. Running a multi-node hybrid OpenMP+MPI calculation

#!/bin/bash
#SBATCH --job-name=test
#SBATCH --nodes=2
#SBATCH --tasks-per-node=16
#SBATCH --cpus-per-task=2
#SBATCH --mem=64000
#SBATCH --time=01:00:00
#SBATCH --output=test.out
#SBATCH --error=test.err
#SBATCH --partition=cluster

export OMP_NUM_THREADS=2
module load intel/20.0.4 intelmpi/20.0.4
mpirun -np 32 ./test.x

5. Running a job array:

#!/bin/bash
#SBATCH --job-name=test
#SBATCH --array=0-9
#SBATCH --nodes=1
#SBATCH --tasks-per-node=1
#SBATCH --cpus-per-task=1
#SBATCH --mem=1000
#SBATCH --time=01:00:00
#SBATCH --output=test-%A_%a.out
#SBATCH --error=test-%A_%a.err
#SBATCH --partition=cluster

export OMP_NUM_THREADS=1
echo "Hi, I am task $SLURM_ARRAY_TASK_ID in the job array $SLURM_ARRAY_JOB_ID"


Batch script templates (GPU subsystem)

In this section, you will find templates for perfoming typical GPU batch jobs.

1. Using one NVIDIA Tesla V100-GPU card in combination with one CPU core

#!/bin/bash
#SBATCH --job-name=test
#SBATCH --nodes=1
#SBATCH --tasks-per-node=1
#SBATCH --cpus-per-task=1
#SBATCH --gpus-per-node=1
#SBATCH --mem=1000
#SBATCH --time=01:00:00
#SBATCH --output=test.out
#SBATCH --error=test.err
#SBATCH --partition=gpu

export OMP_NUM_THREADS=1
./test.gpu.x

2. Using multiple NVIDIA Tesla V100-GPU cards, OpenMP multithreading and all CPU cores on the GPU node

#!/bin/bash
#SBATCH --job-name=test
#SBATCH --nodes=1
#SBATCH --tasks-per-node=1
#SBATCH --cpus-per-task=32
#SBATCH --gpus-per-node=2
#SBATCH --mem=10000
#SBATCH --time=01:00:00
#SBATCH --output=test.out
#SBATCH --error=test.err
#SBATCH --partition=gpu

export OMP_NUM_THREADS=32
./test.gpu.x


Batch script templates (SX-Aurora TSUBASA vector subsystem)

In this section, you will find templates for perfoming typical SX-Aurora TSUBASA batch jobs.

1. Using all 8 vector cores on a single vector engine (OpenMP parallel)

#!/bin/bash
#SBATCH --job-name=test
#SBATCH --nodes=1
#SBATCH --tasks-per-node=1
#SBATCH --cpus-per-task=1
#SBATCH --gres=ve:1
#SBATCH --mem=10000
#SBATCH --time=01:00:00
#SBATCH --output=test.out
#SBATCH --error=test.err
#SBATCH --partition=vector

export OMP_NUM_THREADS=8
export VE_PROGINF=DETAIL
./test.vector.x

2. Using all 8 vector cores on a single vector engine (MPI parallel)

#!/bin/bash
#SBATCH --job-name=test
#SBATCH --nodes=1
#SBATCH --tasks-per-node=1
#SBATCH --cpus-per-task=1
#SBATCH --gres=ve:1
#SBATCH --mem=10000
#SBATCH --time=01:00:00
#SBATCH --output=test.out
#SBATCH --error=test.err
#SBATCH --partition=vector

export OMP_NUM_THREADS=1
export VE_PROGINF=DETAIL
module load necmpi/2.11.0
source necmpivars.sh
mpirun -nn 1 -nnp 8 -ve 0-0 ./test.vector.x

3. Using all 8 vector engines on one vector node (MPI parallel)

#!/bin/bash
#SBATCH --job-name=test
#SBATCH --nodes=1
#SBATCH --tasks-per-node=1
#SBATCH --cpus-per-task=1
#SBATCH --gres=ve:8
#SBATCH --mem=10000
#SBATCH --time=01:00:00
#SBATCH --output=test.out
#SBATCH --error=test.err
#SBATCH --partition=vector

export OMP_NUM_THREADS=1
export VE_PROGINF=DETAIL
module load necmpi/2.11.0
source necmpivars.sh
mpirun -nn 1 -nnp 64 -ve 0-7 ./test.vector.x


Documentation


SX-Aurora TSUBASA vector subsystem

In the following, we have assembled a few manuals in HTML or pdf format:


Acknowledgement of use

We encourage all users to include the following acknowledgement when presenting or publishing research that has profited to a large extent from using the HPC systems:

English: "This research was supported in part through high-performance computing resources available at the Kiel University Computing Centre." German: "Diese Forschung wurde teilweise durch Hochleistungsrechner-Ressourcen unterstützt, die am Rechenzentrum der Christian-Albrechts-Universität zu Kiel zur Verfügung stehen."


Supplementary documentation

For a documentation of additional topics, see the NESH user doc GitLab project.


Support and Consulting

HPC-Support-Team: hpcsupport@rz.uni-kiel.de
Responsible contact persons at the Computing Centre:
Please see HPC-Support and Consulting.