Navigation in the File Tree
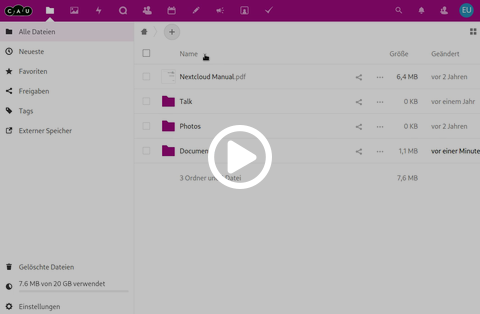
In the files application you can switch between the grid view and the list view in the upper right corner. Above the files and folders you can sort the view by name, by size or by modification date.
To navigate the file tree, you can simply click on a folder to switch to it. In the bar above the sorting you can see the path you are on. You can quickly switch to one of the folders in the path by clicking on it, or you can always return to your root directory by clicking on the little house.
Create files and folders
To create a file or folder in the web interface, you have several options. For many, however, working in the local file explorer is more familiar, for which we then recommend using the Desktop Sync Client.
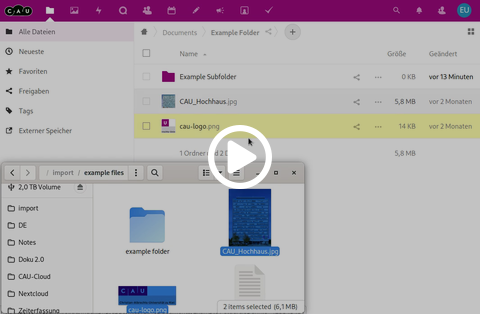
To upload a file from the local file explorer to the CAU Cloud, you can drag one or more files to the folder where you want to save the files. This works not only with files, but also with folders.
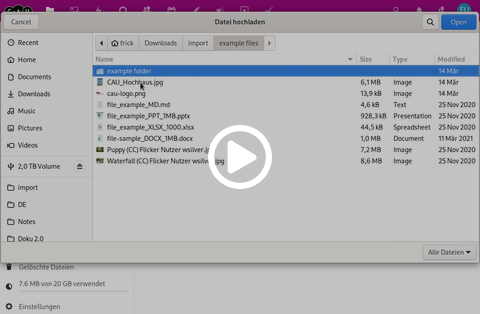
You can also upload one or more files by clicking the + button next to the path above the files and selecting Upload File. An explorer window will open where you can select files to upload. If you hold down the ctrl-key, you can select multiple files. After selection you can upload the files by clicking Open. You cannot upload folders using this method.
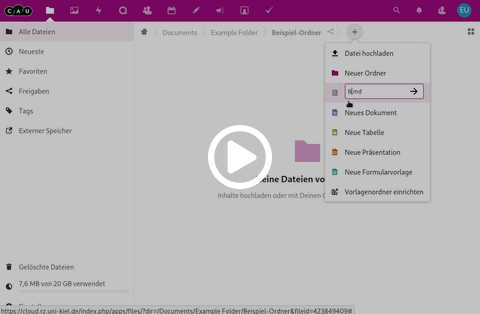
You can also create new folders, office and text documents in the CAU Cloud web interface and edit them directly. Click the + button next to the path above the files and select one of the formats from the context menu. The entry will become a text field pre-filled with a sample name. Change the name and leave the extension and confirm your entry with the enter key or by clicking on the arrow next to the text field. If you have created one or more style sheets for the format, select an empty document or one of the style sheets and confirm your selection with Create. The document or folder is created and opened directly in the corresponding editor.
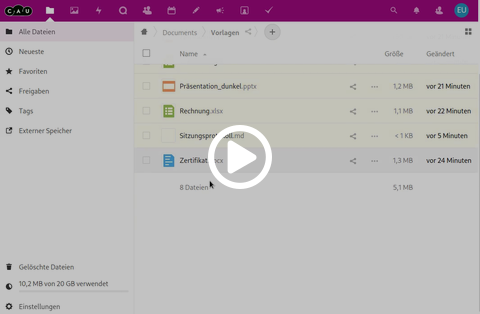
You can work with style sheets for the documents you can create in the web interface. This makes the work easier when you repeatedly create similar documents based on the same template.
First you need to create a template folder where you want to save the templates. Click the + button next to the path above the files and select set up template folder from the list of suggestions. Specify the name of the folder in the text box and confirm your entry with the Enter key or by clicking the arrow next to the text box. Now the template folder will be opened automatically. Now load your desired templates into these folders to be able to select them when creating a file.
Working with files in the web interface
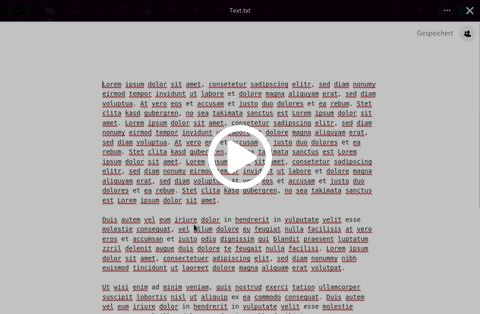
The CAU-Cloud is able to open a number of documents directly in the web interface and to edit some of them. To open a file you have to click on the file, if the file can be processed it will be displayed, or opened in an appropriate editor, otherwise the file will be downloaded and you can open it locally with an appropriate program.
- Compatible file types (partly depending on the browser)
- Images (.bmp, .gif, .jpeg, .jpg, .png, .svg, .webp)
- Videos (.m4v, .mkv, .mov, .mp4, .ogv, .webm)
- PDFs (.pdf)
- Word, Excel, Powerpoint (.docx, .xlsx, .pptx)
- Plain Text (.bash, .c, .c++, .cc, .cnf, .conf, .cpp, .css, .csv, .h, .hh, .hpp, .htaccess, .htm, .html, .java, .js, .json, .ldif, .org, .php, .py, .schema, .sh, .sh-lib, .txt, .xml, .yaml, .yml)
- Markdown Rich Text (.markdown, .md, .mdown, .mdwn, .mkd)
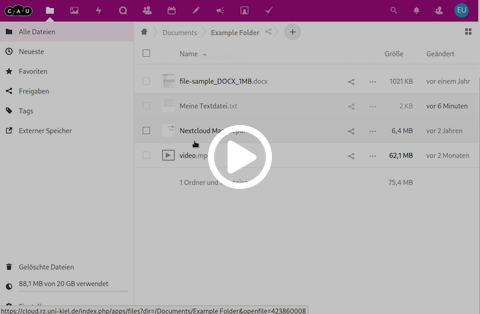
To rename a file or folder in the web interface you have two options, either you can select the Rename menu item next to the file name in the ...-menu, or you right-click on the file and then select Rename. In both cases the name of the file in the file list will change to a text field where you enter the new name and confirm your input with the Enter button.
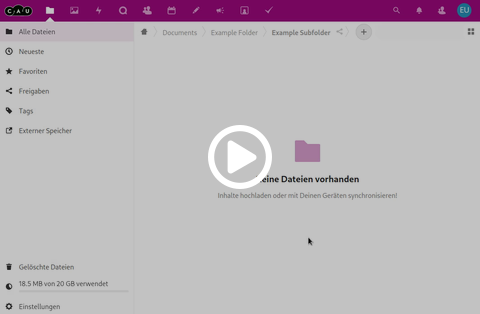
To move files or folders, you have four options to choose from. First, you can select one or more files or folders with the checkbox in front of the file name and then drag and drop them into the desired folder.
The second option allows you to move selected files and folders via a ...-menu above the file list by selecting the menu item Move or Copy. A window opens where you select the desired destination folder and confirm the move with Move by Folder Name, where Folder Name is the name of the destination folder.
As a third and fourth possibility you can open a dialog for individual files or folders as in possibility two by selecting the option Move or Copy in the ...-menu next to the file name or in the context menu that you get by right-clicking.
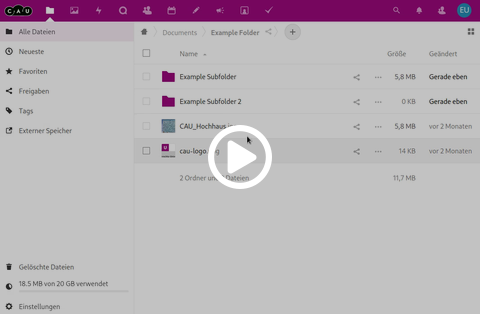
Copying files and folders is very similar to moving, but there are only three options. First you can select one or more files or folders with the box in front of the file name and then copy them via a ...-menu above the file list by selecting the menu item Move or Copy. A window opens where you select the desired destination folder and confirm the process with Copy to folder name, where folder name is the name of the destination folder.
As a second and third possibility you can open a dialog for single files or folders as in possibility one by selecting the option Move or Copy in the ...-menu next to the file name or in the context menu that you get by right-clicking.
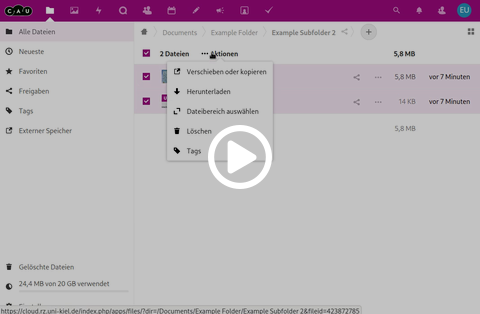
To delete files or folders, you have four options to choose from. First, you can select one or more files or folders with the checkbox in front of the file name and then drag & drop them into the trashbin with the entry Deleted Files at the bottom of the left sidebar.
The second option allows you to delete selected files and folders via a ...-menu above the file list by selecting the Delete menu item.
As a third and fourth possibility you can open a dialog for individual files or folders as in possibility two by selecting the option Delete in the ...-menu next to the file name or in the context menu that you get by right-clicking.
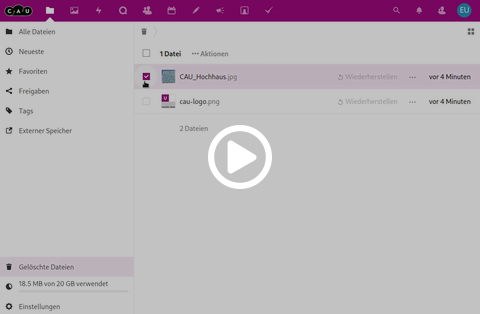
Open the trashbin via the entry Deleted Files at the bottom of the left sidebar. Here you will find an overview of all files and folders that have been deleted. You can permanently delete files and folders here, or restore them if they were accidentally deleted. To process several files and folders, you can select one or more files or folders with the checkbox in front of the file name and then select via a ...-menu above the file list whether you want to restore the files or delete them permanently.
For individual files and folders, you can restore the file directly next to the name or delete a file permanently via a ...-menu next to the file name. When restoring, the files and folders are always copied to the position from which they were deleted. Files in the trashbin are kept for at least 7 days, depending on the utilisation of the storage space of the CAU Cloud, the trashbin can be kept for a maximum of 30 days before the files are automatically permanently deleted. The trashbin can be a maximum of 50% of the storage space still available, if this size is exceeded, the oldest files in the recycle bin older than the minimum storage period of 7 days are deleted.
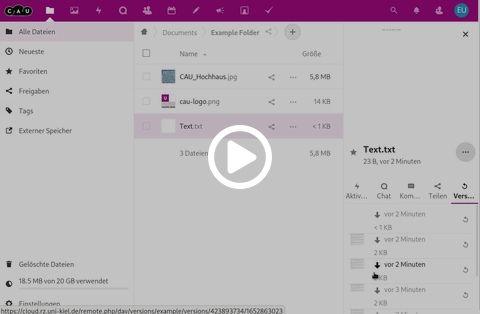
Sometimes small mishaps happen that make it necessary to revert to an old version of a file. For this purpose, versions of a file are saved individually in the CAU Cloud. To access old file versions, select the Details menu item next to the file name in the ...-menu to open the right sidebar. There you will find several pieces of information about the file and various tabs. Open the right tab labelled Versions to get a list of the saved versions. In the list you will see the time when the version was saved and a preview image. With these features, it is usually easy to find the version you want. To check, you can download the version by clicking on the arrow next to the date of change or, in the case of office documents, open it read-only to check if it is the correct version. Once you have identified the version you want, you can restore it by clicking on the arrow pointing in the circle. This will overwrite the current version, but it will remain in the version history in the same way. Versioned files are kept for at least 7 days, depending on the utilisation of the storage space of the CAU Cloud, they can be kept for a maximum of 30 days before they are automatically deleted. Versioned files can be a maximum of 50% of the storage space still available, if this size is exceeded, the oldest file versions older than the minimum storage period of 7 days are deleted.
The saved versions are thinned out according to age, the further back the changes lie according to the following scheme:
- A version is saved from the last second
- Within the last 10 seconds, a maximum of one file is saved every 2 seconds.
- Within the last minute, a maximum of one file is saved every 10 seconds
- Within the last hour, a maximum of one version per minute is saved
- Within the last 24 hours, a maximum of one version per hour is saved
- In the following 30 days, one version per day is saved
Share Files
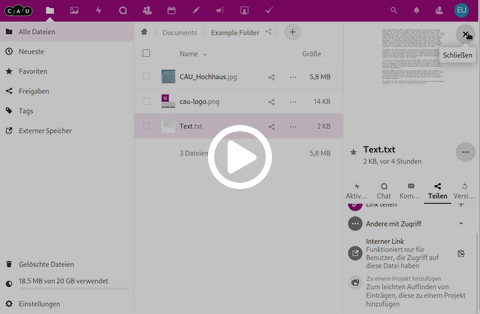
To share a file or folder with others, you have to use the share dialogue. To open this dialogue, you have three options. First, you can open the right sidebar for a file or folder. To do this, select the menu item Details in the ...-menu next to the file name; here you will find several tabs with information about your file. Switch to the tab labelled Share.
As a second option, you can click on the share symbol next to the name of the file or folder in the list of files and folders. This is the symbol with the three dots connected by lines  .
.
The third option uses the context menu that you get by right-clicking on the file, select Share file from the menu.
If you want to share the folder you are in, you can click on the share symbol  in the path above the file list.
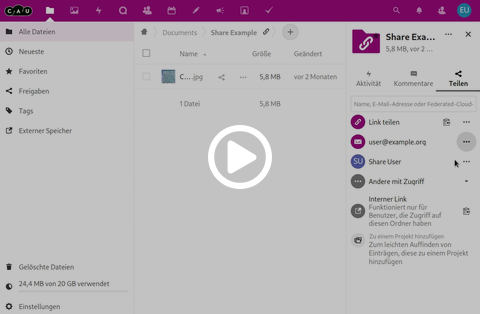
To have a good overview of who can access files, it is helpful to understand the share dialogue. It gives you a list of all the shares that exist for a file. In addition to the various shares, you can access the sharing options via the ...-menu. Here you can also view the permissions for each share or cancel them.
It is important to understand which types of share exist. The CAU Cloud distinguishes between three types.
- Internal sharing is sharing with other CAU Cloud users. These users only have access if they authenticate themselves in the CAU Cloud with their password. Because of this, this the most secure share. Every change to files or folders can be assigned to the recipient of the share. You can recognise an internal share by the avatar or the initials and name of the recipient in the list.
- An e-mail share describes a share that is sent to the recipient by e-mail. It contains an individual link that is uniquely assigned to this e-mail address. However, anyone who receives this link can also use it, unless an additional password has been set. You can recognise an e-mail release by an envelope symbol followed by the e-mail address to which the link was sent.
- A public link is the most insecure type of share, because it no longer allows the person editing it to be identified. The links are not individualised and it is therefore recommended to set up such shares for read-only access. Otherwise, a public link should ideally be provided with an additional password. You can recognise a share as a public link by the clipboard symbol next to the entry Share link in the list of shares.
It is also important to understand the folder hierarchy. If you have shared a parent folder, the recipient of this share also has access to all subfolders. You can see this inheritance of shares if you open the Others With Access tab in the list of shares. Here you can see all shares that also have an effect on the current file through parent shares. You can see in the ...-menu next to the name for which parent folder this share exists, who created it, or cancel the share directly.
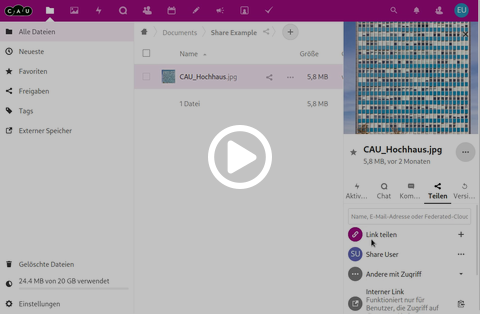
To share a file or folder with other CAU Cloud users, open the sharing dialogue and enter the name, e-mail or identifier in the text field of the sharing dialogue and wait for the suggestions below the text field. Click on the name of the participant from the list to create the share. The following standard permissions apply to an internal share. The user can edit the shared content, can also create and delete files in a folder, but can not share the file and there is no expiration date for the share. You can change these settings for sharing in the sharing options behind the ...-menu.

To share a file or folder by e-mail, open the share dialogue and enter the e-mail address of the recipient in the text field of the share dialogue and wait for the suggestions below the text field. By clicking on the e-mail address with the envelope symbol next to it, the share is created and an e-mail is sent to the recipient. The following standard permissions apply to e-mail approvals. The user is not allowed to edit the shared content, is not allowed to create or delete files in a folder, is not allowed to share the file and there is an expiry date of 30 days for the share. No password is set by default. You can change these settings for sharing in the share options behind the ...-menu.
If you decide on a password, it must comply with the password guidelines of the computing centre and contain at least 9 characters, at least one of each of the categories lower case letters, upper case letters, numbers and special characters. You must communicate this password to the user by another means.
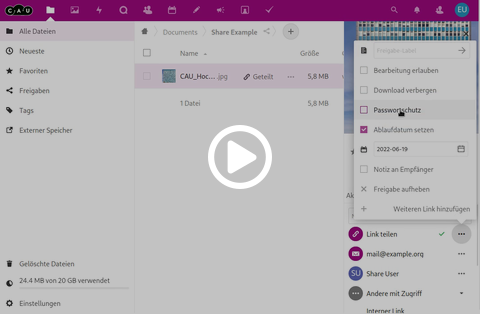
To share a file or folder as a public link, open the share dialogue and click on the +-symbol next to the share link entry. This creates a link and copies it to your clipboard. In the list, the +-symbol becomes a ...-symbol with the share options and a clipboard symbol appears next to it, which you can use later to copy the link again. The following standard permissions apply to link shares. The user is not allowed to edit the shared content, is not allowed to create or delete files in a folder, is not allowed to share the file and there is an expiration date of 30 days for the share. No password is set by default. You can change these settings for sharing in the share options behind the ...-menu.
If you decide on a password, it must comply with the password guidelines of the computing centre and contain at least 9 characters, at least one of each of the categories lower case letters, upper case letters, numbers and special characters. You must communicate this password to the user by another means.
If you receive content in the CAU Cloud from colleagues, cooperation partners or students, you must accept this approval before you can access the content. This standard behaviour was different until 01.03.2022, when shares were automatically accepted and did not need to be confirmed.
In the following, three possibilities are described how you can accept a share, via the web interface, via a link in the notification e-mail, or via the Desktop Sync Client, and at the end it is also described how you can optionally accept shares again automatically.
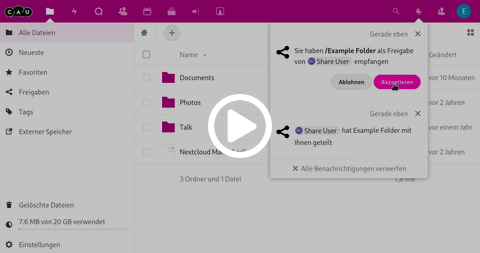
In the web interface of the CAU Cloud, you will find the notifications in the top right-hand corner behind the icon with the bell. In the event of sharing, you will also be shown here who would like to share which content with you. You can then select directly in this dialogue whether you want to accept or reject a share.
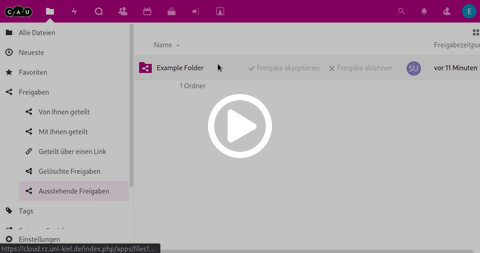
If you have discarded the notifications, you can still accept the pending share in the web interface. To do this, open the submenu shares in the left sidebar of the files application and then the subitem pending shares. Here you get a list of all pending shares and can accept or reject them here.
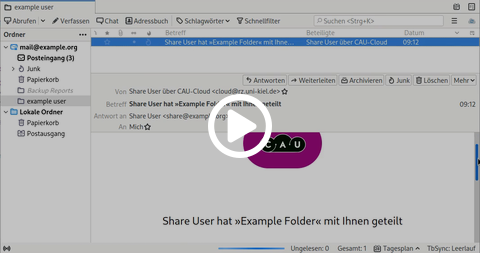
If someone shares a file or folder with you, you will receive a notification by e-mail. This e-mail also contains a link that you can use to open the shared content directly in your browser. At the same time, clicking on this link accepts the sharing.
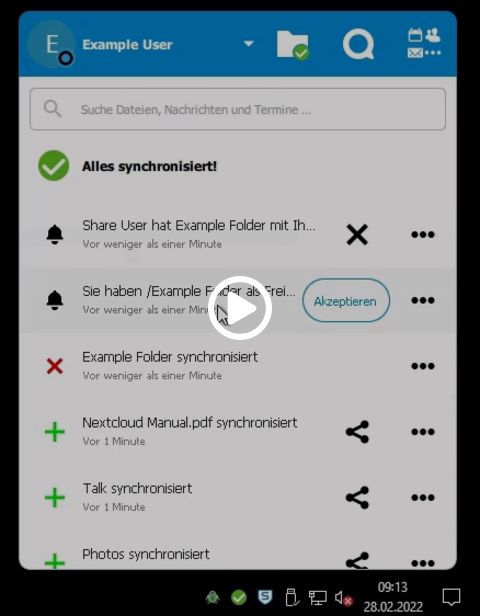
If you use the Desktop Sync client, notifications are also displayed to you as desktop notifications, provided you have not deactivated them in the settings. You can also click on the logo of the Desktop Sync client in the taskbar to open the dialogue that shows the latest changes. Here, in the case of a share, you can also accept the share with a click on accept, or reject it in the context menu with the three dots.
If you do not always want to accept shares manually, you can set the web interface to automatically accept all new shares to you. This has certain risks if people share files with you that were not intended for you or whose content can and should harm you. These files are usually also copied to your workstation while the sync client is running! In the case of very large shares, it is also possible that the hard disk on your end device will fill up. By default, however, the sync client is configured so that new content must be confirmed if it is larger than 500 MB.
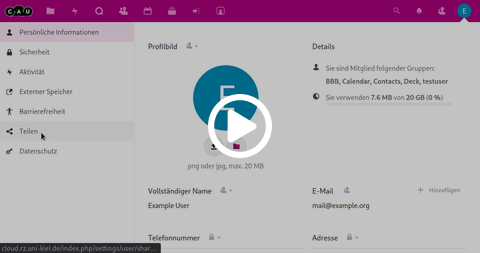
In the CAU Cloud web interface, you can open your settings via the account menu in the top right-hand corner. In the left sidebar of pages you will find the subitem share. If you now scroll all the way down in the settings, you will find the checkbox "Accept user and group shares by default", if you select the box, new shares will be accepted automatically.
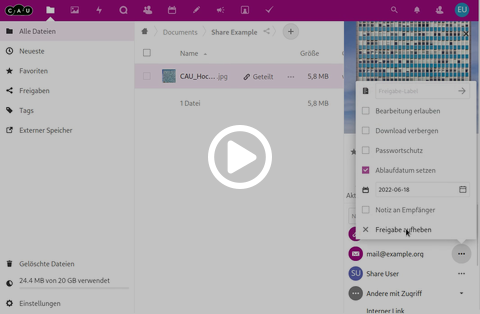
To cancel a file or folder share, open the share dialogue and open the share options via the ...-symbol. Select the menu item Unshare to cancel the share.


 .
.


