Synchronize calendars using Thunderbird
To synchronize your CAU-Cloud calendars with Thunderbird, you will need two plugins, TbSync and Provider for CalDAV & CardDAV.
- Installation of the plugins TbSync and Provider for CalDAV & CardDAV
- Setup of CAU-Cloud calendars in TbSync
Installation of the plugins TbSync and Provider for CalDAV & CardDAV
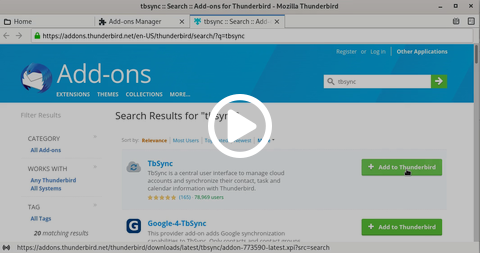
In the main menu of Thunderbird, open the context menu using the ≡-button. In this Menu choose Add-ons and themes to open the Add-on repository. From the left side panel choose Extensions and enter tbsync into the search field on the top. Press Enter to start the search and find TbSync from the results. Click the button Add to Thunderbird and start the installation by clicking on Add in the popup window. Now scroll to Provider for CalDAV & CardDAV and repeat the steps to install this extension as well.
Setup of CAU-Cloud calendars in TbSync
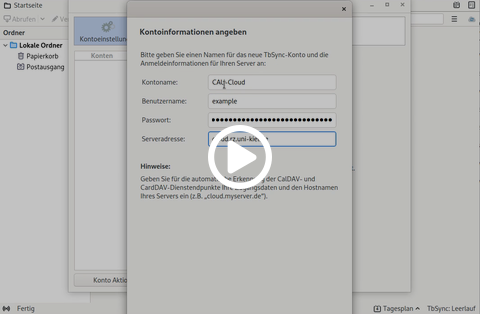
Now that you have TbSync installed, you should find a new Cloud-Symbol in the main window. Click on the cloud-symbol to open the TbSync account manager. In the bottom left choose Account actions and then Add new account > CalDAV & CardDAV Choose Automatic Configuration and confirm this step with Next. Now fill in the user data:
- Account name: Arbitrary text you can use to identify the account later
- User name: Your account name in the CAU-Cloud, e.g. suabc123
- Password: Your CAU-Cloud password. If you have enabled 2-factor-authentification, you will have to generate an App-Password
- Server URL: cloud.rz.uni-kiel.de
Confirm the data using the Next-button and then choose Finish. You will get back to the TbSync account manager where you can select your configuration under the Account name you chose before. On the right side you will find the synchronization status, where you can also activate the configuration by enabling the option Enable and synchronize this account. Now the configuration will be tested and a list of address books and calendars will be shown as Available resources. Choose the entries you want to be synchronized and click on Synchronize now. The status on the top should change to OK now and the setup is complete.


