Manage calendars
In this article you will learn about managing different types of calendars within the CAU-Cloud web interface.
- Create calendar
- Rename calendars
- Change calendar color
- Delete a calendar
- Restore deleted calendar
- Subscribe to external calendar
- Subscribe to CAU-Cloud Calendars in different programs
- Enable or disable the birthday calendar
- Export a calendar
- Import a calendar
Create calendar
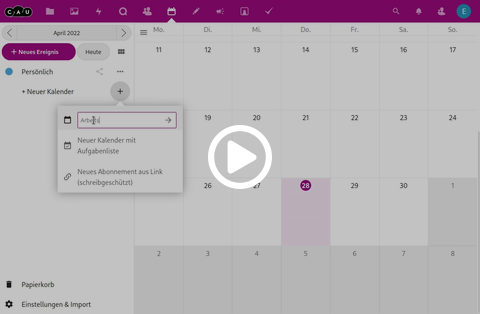
To create a new calendar, select the +-symbol next to the entry New calendar in the left side panel. Choose the entry New calendar from the submenu and enter the name of the new calendar into the text field. Confirm the name using the enter button or click the arrow next to the name.
Rename calendars
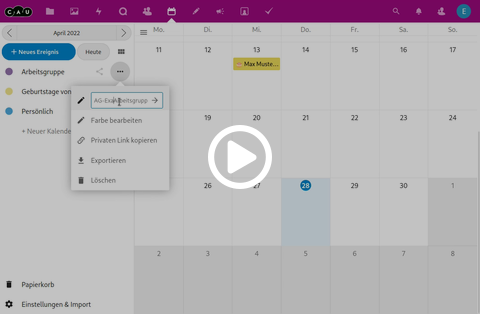
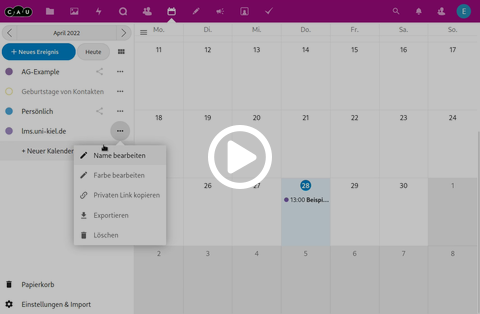
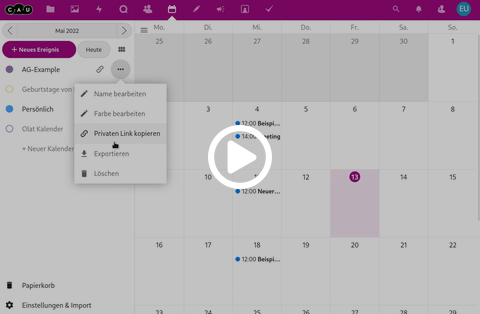
To rename a calendar, choose the ...-button next to the name of the calendar in the left side panel to open the overlay window with the calendar options. Choose Edit name from the list of options and enter the new name for the calendar into the text field. Confirm the name using the enter button or click the arrow next to the name.
Change calendar color
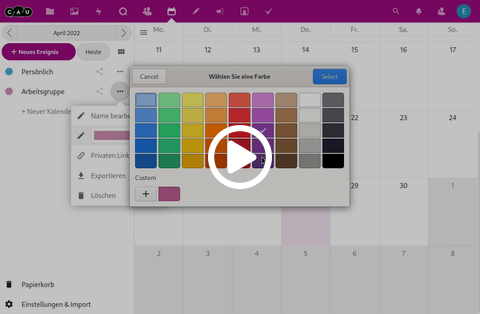
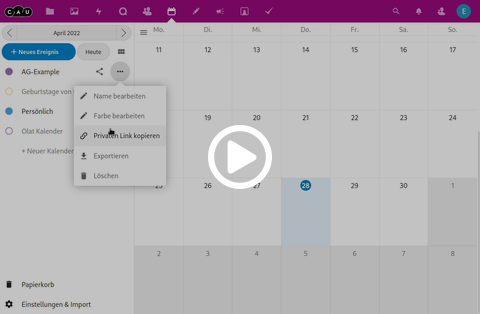
To change the calendar's color, choose the ...-button next to the name of the calendar in the left side panel to open the overlay window with the calendar options. Choose Edit color from the list of options or click on the rectangle in the color of the calendar. In the overlay, please choose a color from the suggested list or add a custom color using the +-button. Confirm your changes using the Select button and then again by clicking the arrow next to the colored rectangle. Dependent on your browser this interface can look a bit different.
Delete a calendar
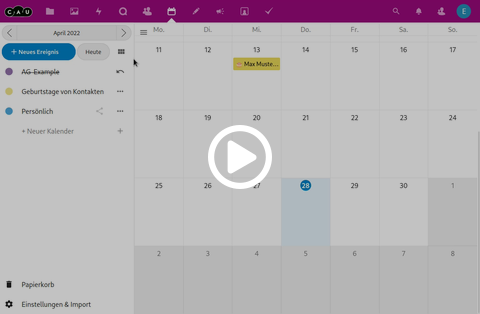
To delete a calendar in the CAU-Cloud, choose the ...-button next to the name of the calendar in the left side panel to open the overlay window with the calendar options. Choose Delete from the list of options. For a couple of seconds the calendar will be marked as deleted and will be displayed strike through. You can cancel the deletion by clicking the left heading arrow next to the calendar. After a couple of seconds the calendar will be deleted, you can still restore it from the trash bin for some time.
Restore deleted calendar
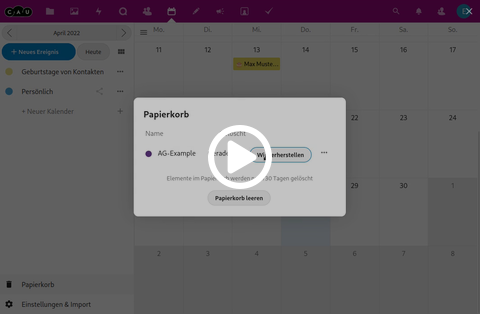
To restore a deleted calendar from the trash bin, open the trash bin on the bottom of the left side panel. The trash bin will open in an overlay window, in which you can see a list of all deleted calendars and appointments. Choose the calendar you want to restore and click the Restore-Button next to the name. Klick next to the overlay to close the trash bin again. Deleted appointments and calendars will be kept for 30 days in your trash bin before they are deleted completely.
Subscribe to external calendar
To subscribe to an external calendar, you will need the subscription link for the calendar. How you can get this, you will have to look up in the documentation for the external calendar. Such subscriptions will always be read only, so you will not be able to create or edit Appointments in this calendar.
To subscribe to an external calendar, select the +-symbol next to the entry new calendar in the left side panel. Choose the entry New subscription from link (read-only) from the submenu and insert the subscription link into the text field. Confirm the subscription with the enter button, or click on the arrow in the text field. The new calendar will be named after the server of the external calendar, so in moist cases you will want to rename the calendar afterwards.
Subscribe to CAU-Cloud Calendars in different programs
To subscribe to your CAU-Cloud calendars in different programs, like your e-mail program, you will need a CalDAV enabled program. As we cannot give you a tutorial for each and every mail program out there, we have prepared a tutorial for a couple of popular applications.
- Synchronize calendars using Android OS
- Synchronize calendars using iOS
- Synchronize calendars using Outlook 201X
- Synchronize calendars using Thunderbird
In some programs it might be necessary to provide the full path to the calendar within the CAU-Cloud instead of just "cloud.rz.uni-kiel.de". In this case you need to copy the private link in the web interface.
To copy the private link, choose the ...-button next to the name of the calendar in the left side panel to open the overlay window with the calendar options. Choose Copy private link from the list of options to copy the link to your clipboard.
Enable or disable the birthday calendar
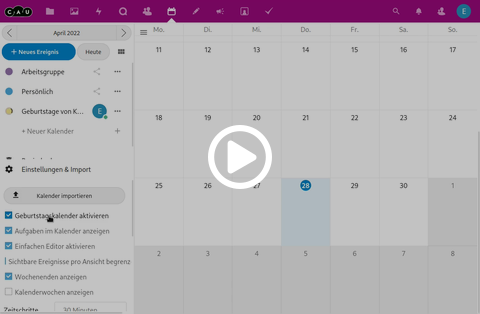
The CAU-Cloud allows users to automatically create a calendar with their contacts birthdays. To enable the birthday calendar, open the application settings on the bottom of the left side panel by clicking the button Settings & import. Here you will find an option Enable birthday calendar to enable or disable the birthday calendar.
Export a calendar
To export all appointments of a calendar, choose the ...-button next to the name of the calendar in the left side panel to open the overlay window with the calendar options. Choose Export from the list of options to save all appointments in the calendar to an .ics-file.
Import a calendar
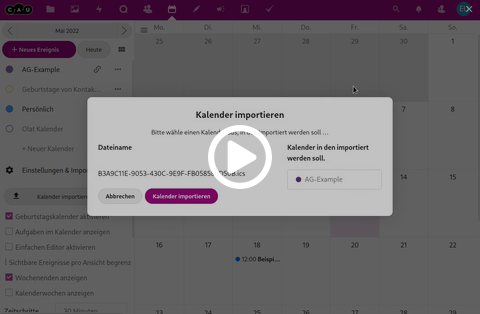
To import one or many appointments into the CAU-Cloud, open the application settings on the bottom of the left side panel by clicking the button Settings & import. Here you will find a button Import calendar, which opens a file explorer, in which you can choose an .ics-file. This file is then uploaded and the import dialog will open. Here you can choose a calendar to import the appointments into or create a new calendar. After confirming your selection with the Import calendar button, the appointments will be imported into the selected calendar.

